Apollo Server is an open-source, spec-compliant GraphQL server that’s compatible with any GraphQL client, including Apollo Client. It’s the best way to build a production-ready, self-documenting GraphQL API that can use data from any source.
You can use Apollo Server as:
- A stand-alone GraphQL server, including in a serverless environment
- An add-on to your application’s existing Node.js middleware (such as Express or Fastify)
- A gateway for a federated data graph
Apollo Server provides:
- Straightforward setup, so your client developers can start fetching data quickly
- Incremental adoption, allowing you to add features as they’re needed
- Universal compatibility with any data source, any build tool, and any GraphQL client
- Production readiness, enabling you to ship features faster
You can check out the official guide for Apollo or follow the below steps here.
#1. Getting started with Apollo Project
If you don’t have Visual Studio Code, the first thing that you can do is install it. To install VS Code, just go to the Download section and select the OS. If you’re on Ubuntu like me, download the .deb package. Run the below command to install it.
$ sudo dpkg -i <vs-code>.deb
Once VS Code is installed, create a new project directory.
$ mkdir apollo-graphql
$ cd apollo-graphql
#2. Initialize a new node project
Run the below command to initialize a new Node.js project.
$ npm init --yes
The best feature about VS Code is that you get an inbuilt terminal from where you can run the commands.
This will create a package.json file for Node project.
{
  "name": "graphql-server",
  "version": "1.0.0",
  "description": "",
  "main": "index.js",
  "scripts": {
    "test": "echo \"Error: no test specified\" && exit 1"
  },
  "keywords": [],
  "author": "",
  "license": "ISC",
  "dependencies": {
    "apollo-server": "^2.19.0",
    "graphql": "^15.4.0"
  }
}
If you don’t have npm installed, you will need to install it. If you’re on Ubuntu like me, you can use the below command.
$ sudo apt install npm
#3. Install Apollo Server & GraphQL
Run the below command.
$ npm install apollo-server graphql
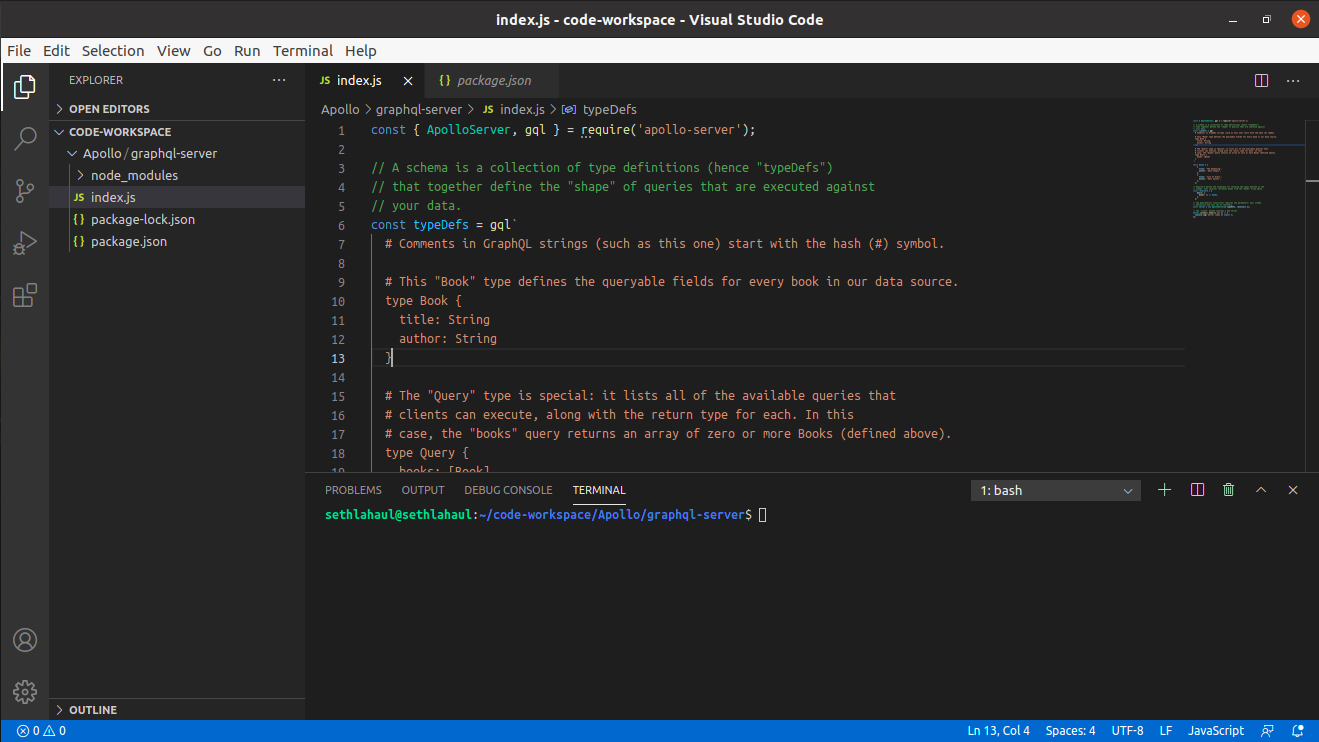
#4. Create index.js
In the next step, create index.js which will have the below 4 functionalities.
- GraphQL schema
- Data set definition
- Resolver definition
- Apollo server instance
const { ApolloServer, gql } = require('apollo-server');

// A schema is a collection of type definitions (hence "typeDefs")
// that together define the "shape" of queries that are executed against
// your data.
const typeDefs = gql`
  # Comments in GraphQL strings (such as this one) start with the hash (#) symbol.

  # This "Book" type defines the queryable fields for every book in our data source.
  type Book {
    title: String
    author: String
  }

  # The "Query" type is special: it lists all of the available queries that
  # clients can execute, along with the return type for each. In this
  # case, the "books" query returns an array of zero or more Books (defined above).
  type Query {
    books: [Book]
  }
`;

const books = [
    {
      title: 'The Awakening',
      author: 'Kate Chopin',
    },
    {
      title: 'City of Glass',
      author: 'Paul Auster',
    },
  ];

// Resolvers define the technique for fetching the types defined in the
// schema. This resolver retrieves books from the "books" array above.
const resolvers = {
    Query: {
      books: () => books,
    },
  };

// The ApolloServer constructor requires two parameters: your schema
// definition and your set of resolvers.
const server = new ApolloServer({ typeDefs, resolvers });

// The `listen` method launches a web server.
server.listen().then(({ url }) => {
  console.log(`Server ready at ${url}`);
});
#6. Run the server
Run the server using the below command.
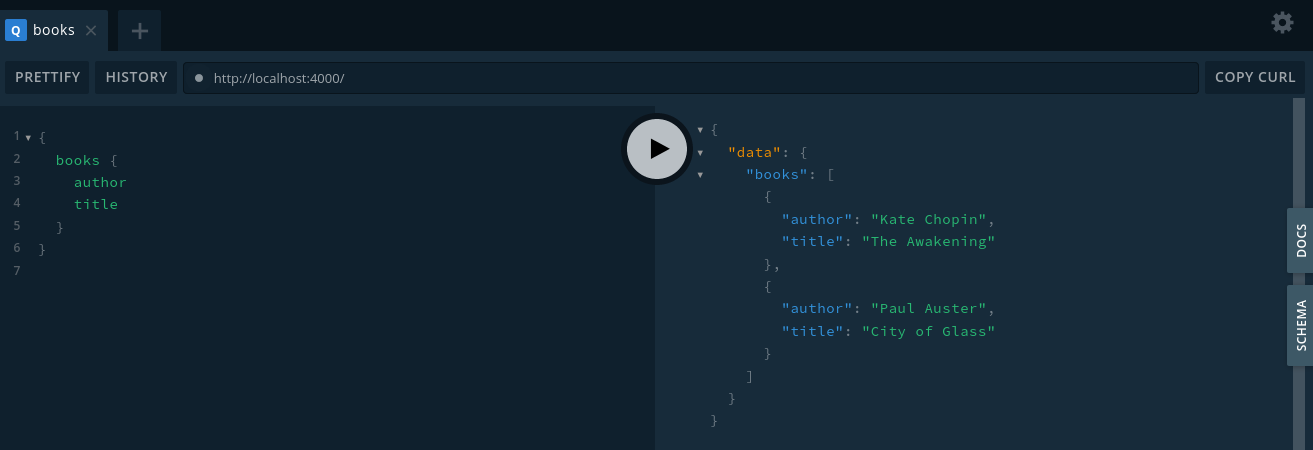
$ node index.js
Server ready at http://localhost:4000/
If you open the link on browser, you will be able use the GraphQL Playground to run queries or mutations.
So, that’s it for this tutorial. Stay tuned for more.