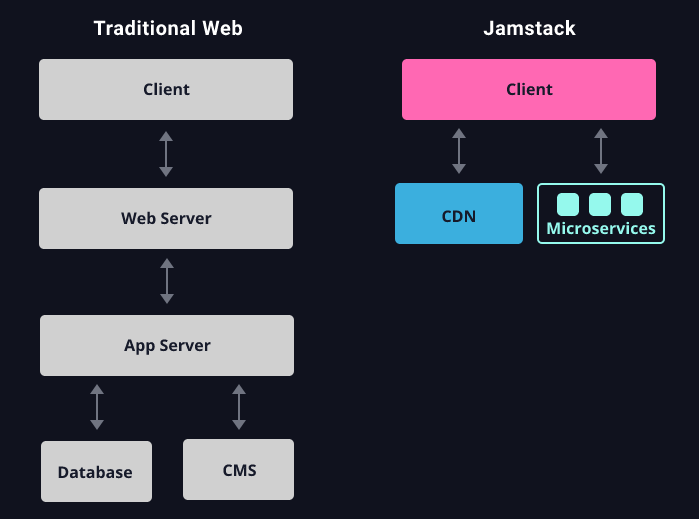
Jamstack is the new standard distributed architecture for the web. It’s faster, secure and highly scalable. Using Git workflows and modern build tools, pre-rendered content is served to a CDN and made dynamic through APIs and serverless functions. Technologies in the stack include JavaScript frameworks, Static Site Generators, Headless CMSs, and CDNs.
Here’s how you can get started with a Jamstack site with Stackbit.
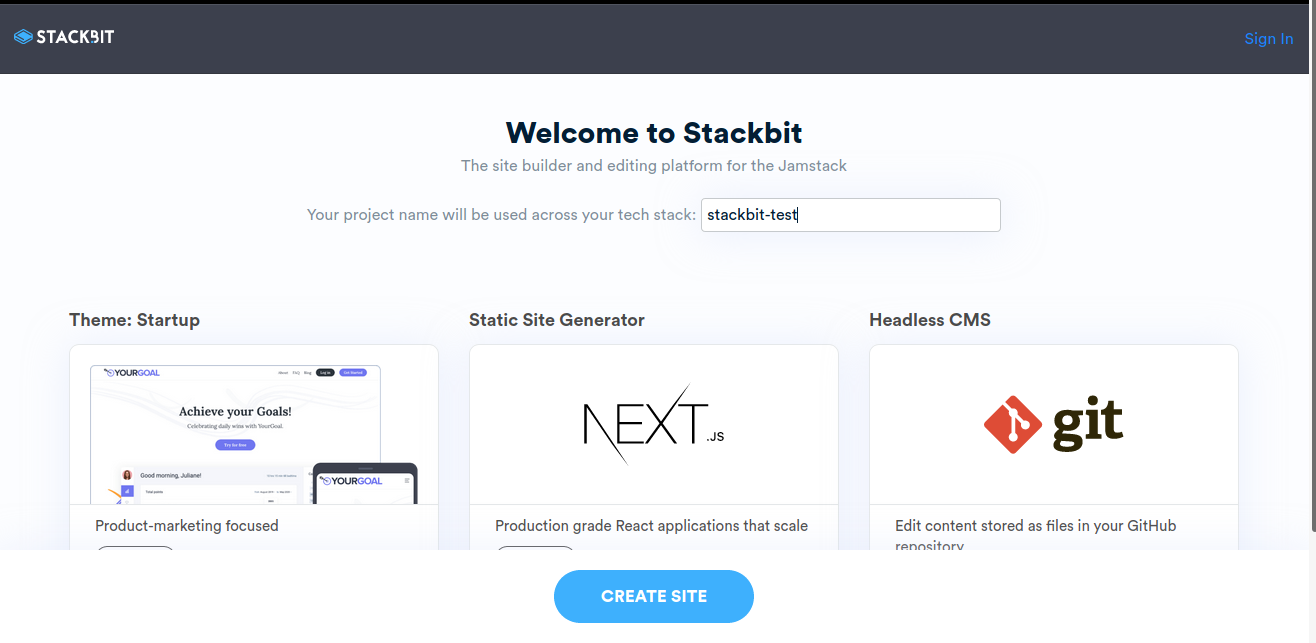
1. Create a new Jamstack site
Stackbit lets you visually edit your Jamstack sites. To start with a new Jamstack site, go to Jamstack Themes. Select the theme that you want to use.
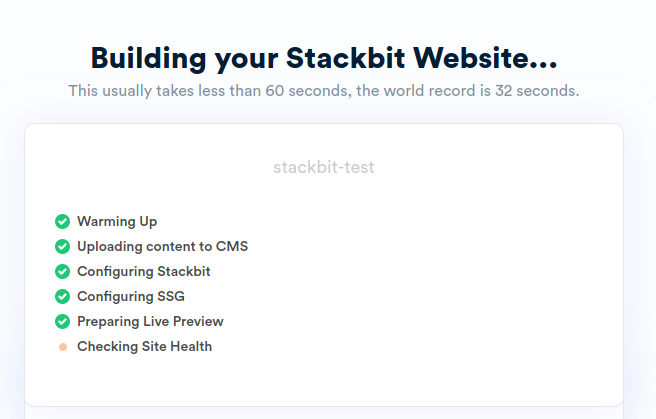
This automatically creates and deploys a new site for you.
2. Visually Edit Your Site
Once your site has been built, you would be able to visually edit your site. The visual builder is similar to how drag and drop builder works.
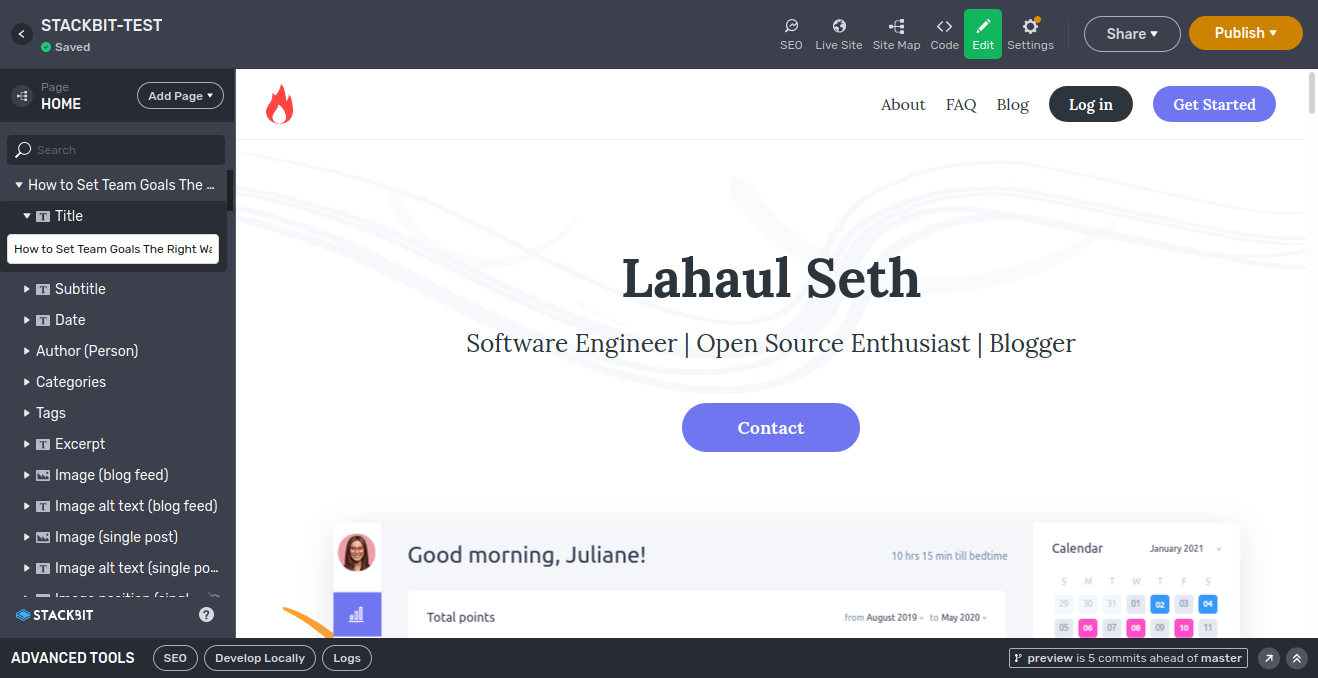
Stackbit also allows you to do your own SEO configuration for the site. You can enter modify the SEO title and meta description from the visual editor.

3. Developing Jamstack Site Locally
Each site that you create gets stored in Github which you can clone to your local setup. The sites get deployed as a Netlify app. Netlify is a serverless platform to build, deploy, and collaborate on web apps. You can deploy your web apps in seconds from your Git repository.
git clone [email protected]:stackbit-projects/<project>.git
cd <project>
git checkout preview
npm install
npm run develop
When you have made your changes, you can commit and see the changes to your Jamstack site. Netlify not only makes site changes easier but also makes your build and deployment much faster.
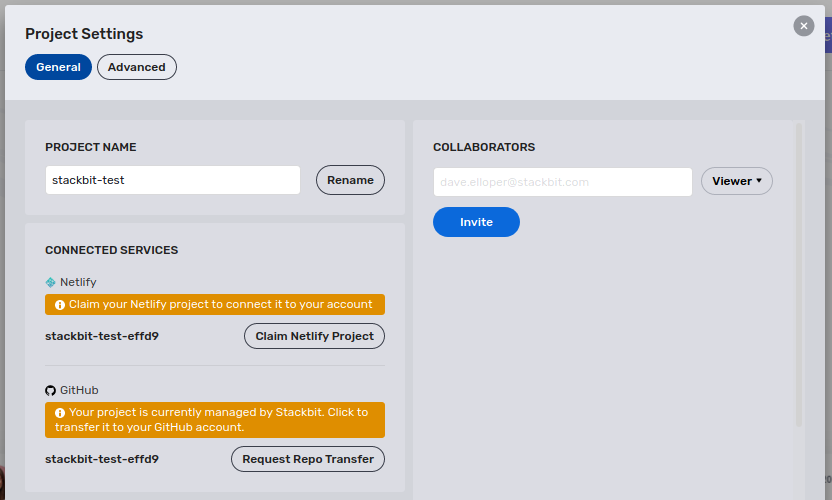
By default, the project is managed by Stackbit in Github. You can choose to transfer your repository to your own Github account. You can also claim your Netlify project and connect it to your own account.
Once you have made the changes, you can view your site. By default, the domain will be that of a Netlify domain. You can connect your own external domain to your app as well.
So, that’s it for this tutorial. Stay tuned for more.