Docker is a set of platform as a service products that use OS-level virtualization to deliver software in packages called containers. Containers are isolated from one another and bundle their own software, libraries and configuration files; they can communicate with each other through well-defined channels. This post is a simple tutorial on how you can Dockerize a Spring Boot Application and run it as a container.
The easiest way to Dockerize a Spring Boot Application is to use a simple Dockerfile in your project. A few weeks ago, I wrote a tutorial on how to use Swagger with Spring Boot. I have used the same code and Dockerized it. Also, make sure you have Docker installed.
#1. Create a Dockerfile
The first step that you need to do is create a Dockerfile in your Project root.
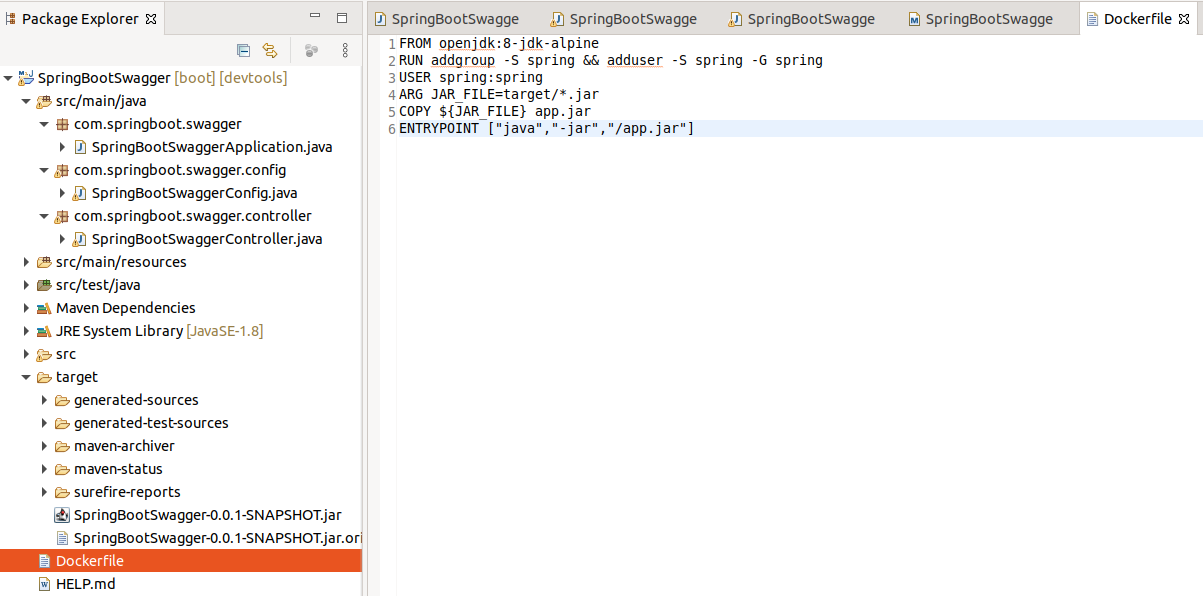
When you create the Docker image, this basically will run the application using non-root privilege.
FROM openjdk:8-jdk-alpine
RUN addgroup -S spring && adduser -S spring -G spring
USER spring:spring
ARG JAR_FILE=target/*.jar
COPY ${JAR_FILE} app.jar
ENTRYPOINT ["java","-jar","/app.jar"]
#2. Build the Docker image
To build the Docker image, go to the same directory where Dockerfile is present. Run the below command.
$ docker build -t spring-boot-swagger-docker .
Sending build context to Docker daemon   25.4MB
Step 1/6 : FROM openjdk:8-jdk-alpine
8-jdk-alpine: Pulling from library/openjdk
e7c96db7181b: Pull complete
f910a506b6cb: Pull complete
c2274a1a0e27: Pull complete
Digest: sha256:94792824df2df33402f201713f932b58cb9de94a0cd524164a0f2283343547b3
Status: Downloaded newer image for openjdk:8-jdk-alpine
 ---> a3562aa0b991
Step 2/6 : RUN addgroup -S spring && adduser -S spring -G spring
 ---> Running in 640f6bdd803d
Removing intermediate container 640f6bdd803d
 ---> 6c8dedc4ddaf
Step 3/6 : USER spring:spring
 ---> Running in 8a18e5479e13
Removing intermediate container 8a18e5479e13
 ---> 5d6a633ec222
Step 4/6 : ARG JAR_FILE=target/*.jar
 ---> Running in 9b3a87c9561c
Removing intermediate container 9b3a87c9561c
 ---> 9fa6b15f0fd4
Step 5/6 : COPY ${JAR_FILE} app.jar
 ---> b75ce446dac4
Step 6/6 : ENTRYPOINT ["java","-jar","/app.jar"]
 ---> Running in 3571f355d675
Removing intermediate container 3571f355d675
 ---> 677535798fce
Successfully built 677535798fce
Successfully tagged spring-boot-swagger-docker:latest
To check if the image has been created, run the below command.
$ docker images -a
REPOSITORY                   TAG            IMAGE ID       CREATED         SIZE
spring-boot-swagger-docker   latest         677535798fce   9 hours ago     130MB
<none>                       <none>         b75ce446dac4   9 hours ago     130MB
<none>                       <none>         9fa6b15f0fd4   9 hours ago     105MB
<none>                       <none>         5d6a633ec222   9 hours ago     105MB
<none>                       <none>         6c8dedc4ddaf   9 hours ago     105MB
openjdk                      8-jdk-alpine   a3562aa0b991   20 months ago   105MB
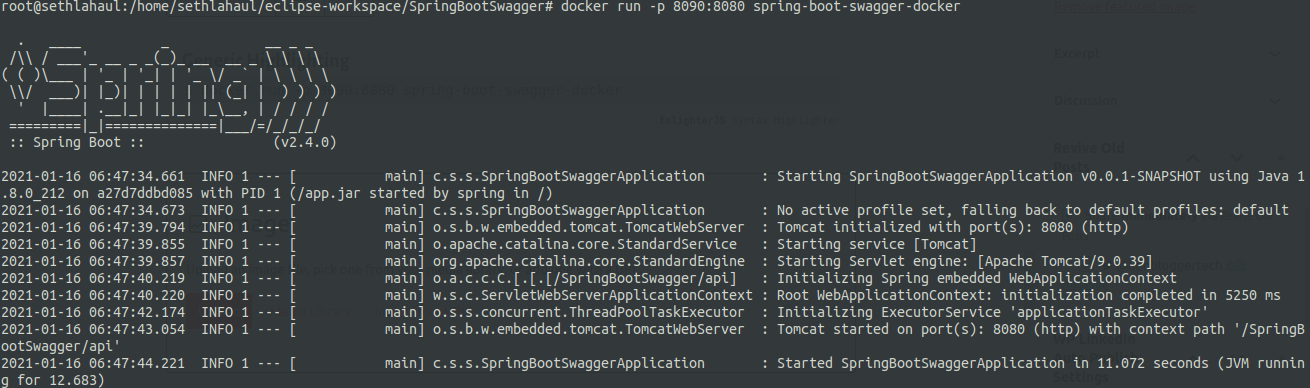
#3. Run the container
To run the container, use the below command. This will run your application on port 8090.
$ docker run -p 8090:8080 spring-boot-swagger-docker
To check if your container is running, use the below command.
$ docker ps -a
CONTAINER ID   IMAGE                        COMMAND                CREATED              STATUS                       PORTS
ac5c8ee39b32   spring-boot-swagger-docker   "java -jar /app.jar"   About a minute ago   Up About a minute            0.0.0.0:8090->8080/tcp
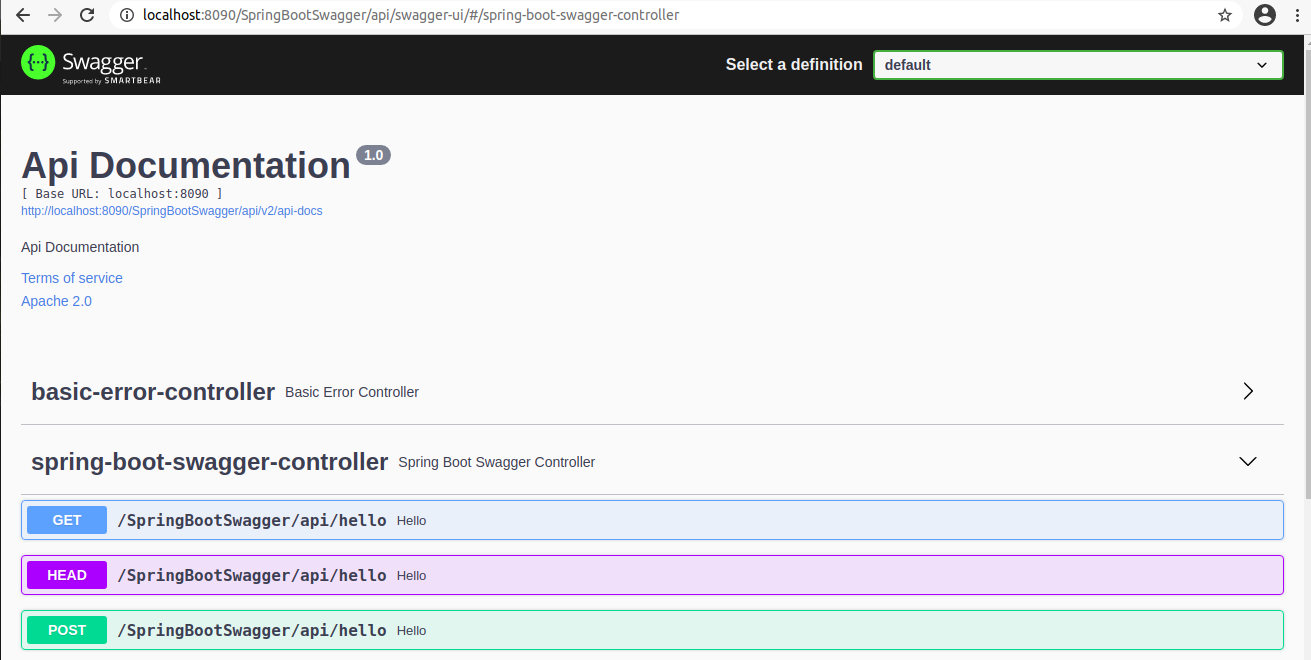
You can now check on your local browser by verifying if the Swagger UI loads up.
So, that’s it for this tutorial. Stay tuned for more.