AWS Elastic Beanstalk is an easy-to-use service for deploying and scaling web applications and services developed with Java, .NET, PHP, Node.js, Python, Ruby, Go, and Docker on familiar servers such as Apache, Nginx, Passenger, and IIS.
You can simply upload your code and Elastic Beanstalk automatically handles the deployment, from capacity provisioning, load balancing, auto-scaling to application health monitoring. At the same time, you retain full control over the AWS resources powering your application and can access the underlying resources at any time.
Spring Boot makes it easy to create stand-alone, production-grade Spring based Applications that you can “just run”.
Swagger UI allows anyone — be it your development team or your end consumers — to visualize and interact with the API’s resources without having any of the implementation logic in place.
If you’re new to Spring Boot and Swagger, you can check out one of my old articles to know how to set it up.
1. Getting started with AWS
You can get started with AWS with Free Tier account. You will get 12 months of free access to most of the services.
2. Getting started with Elastic Beanstalk
- From AWS Management Console, select Elastic Beanstalk.
- Click on Create Application.
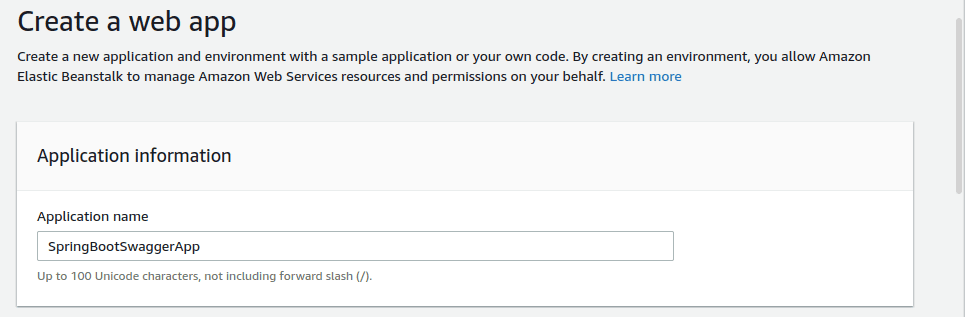
- Next, provide an application name and choose the appropriate platform name. For Spring Boot, it’s Java.
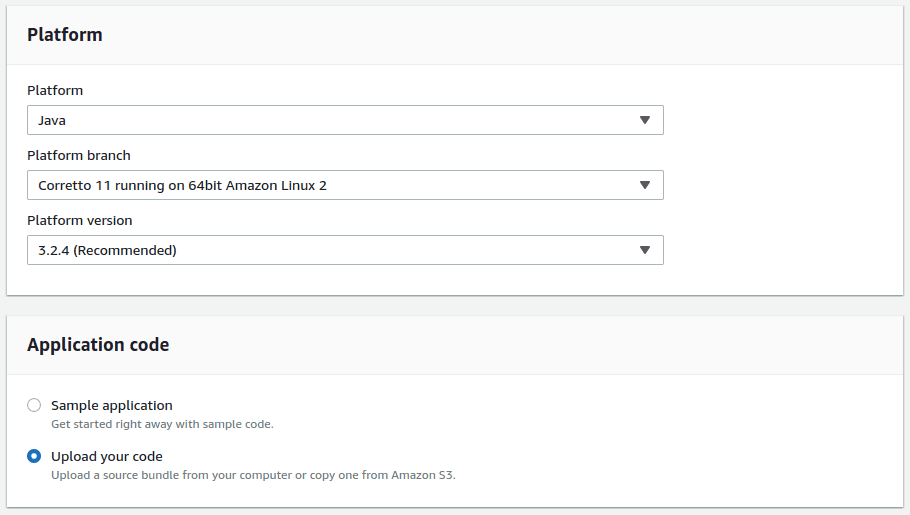
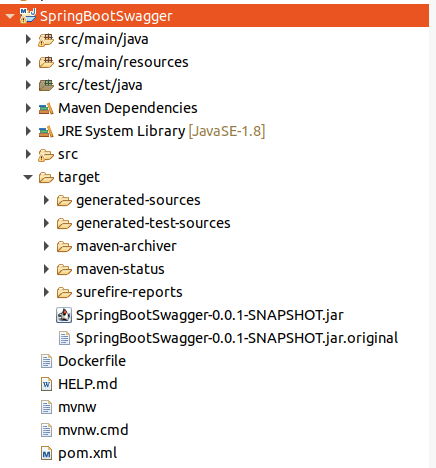
- Upload your application jar file. If you’re using Maven, you can build a jar using Maven Install which would create a snapshot jar in your target folder.
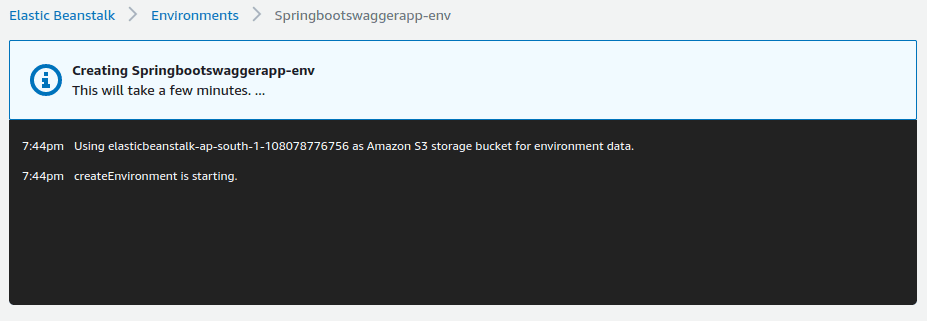
- Once the jar is uploaded, Elastic Beanstalk will create the environment to run your code.
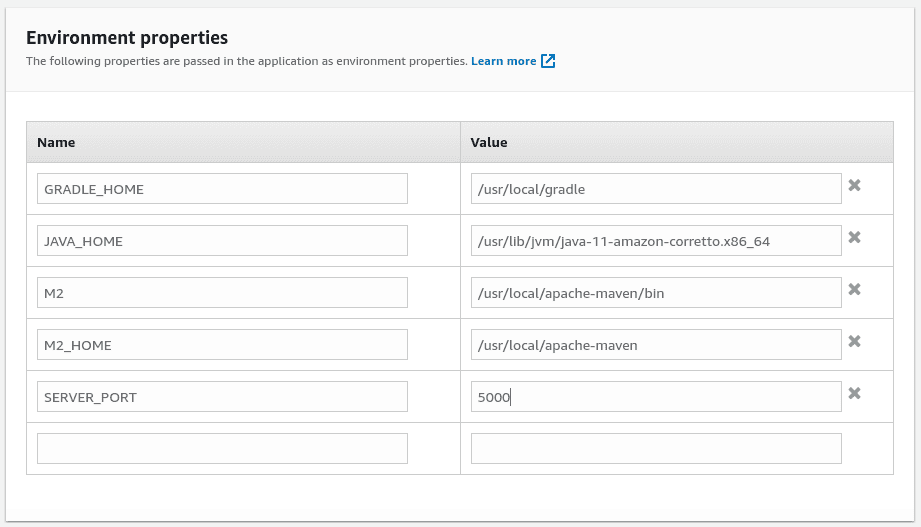
- By default, your code will throw a warning since Elastic Beanstalk runs on port 5000 while Spring Boot’s embedded Tomcat runs on 8080.
- To fix this, go into the Configuration tab and select Software category. Under Environment properties, add SERVER_PORT with value 5000. Click on Apply.
- After you click on Apply, Elastic Beanstalk will update your environment.
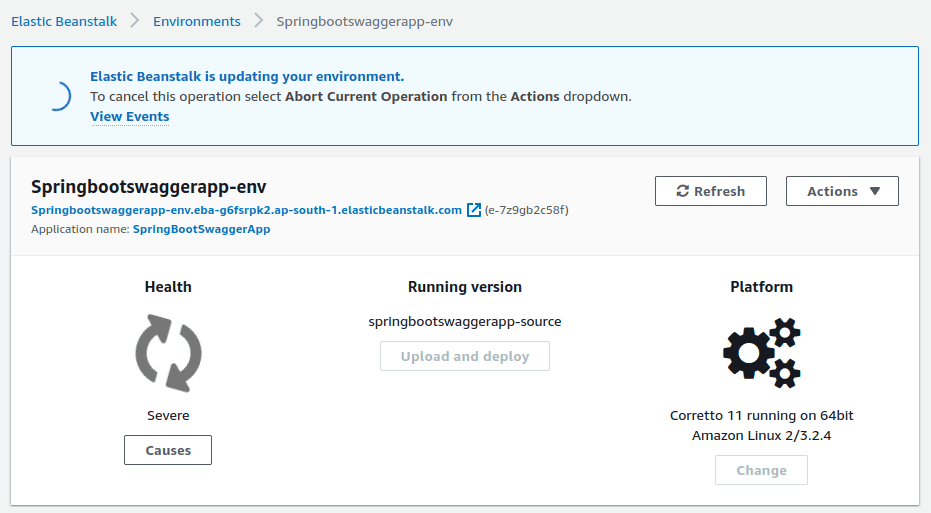
- Once the environment is updated, you can launch your application. Replace localhost:8080 with the AWS url. Make sure to keep the context url same. You should be able to see your application getting launched.

That’s it. You now have a Spring Boot Swagger application running on AWS.
3. Application Monitoring
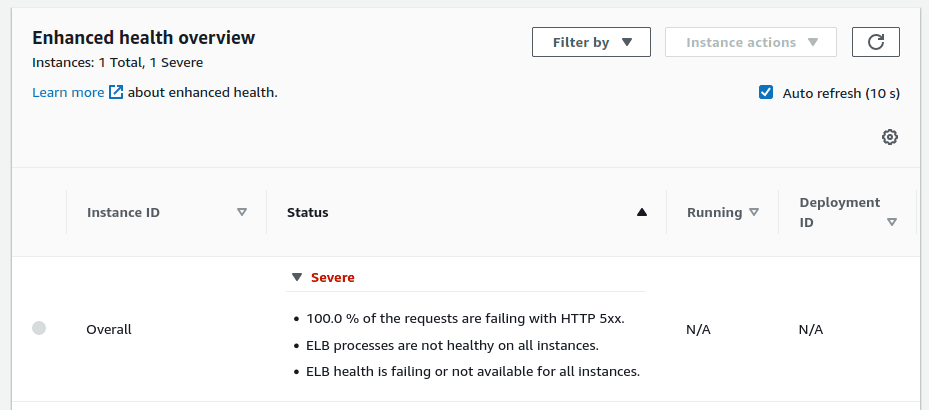
Elastic Beanstalk allows you to monitor your application health. You can check CPU utilization, Max Network In, Max Network Out etc.
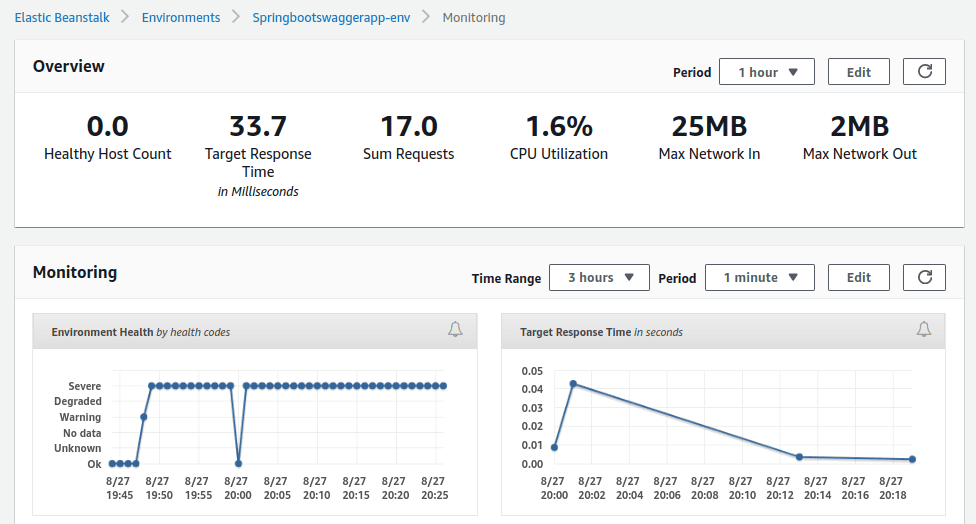
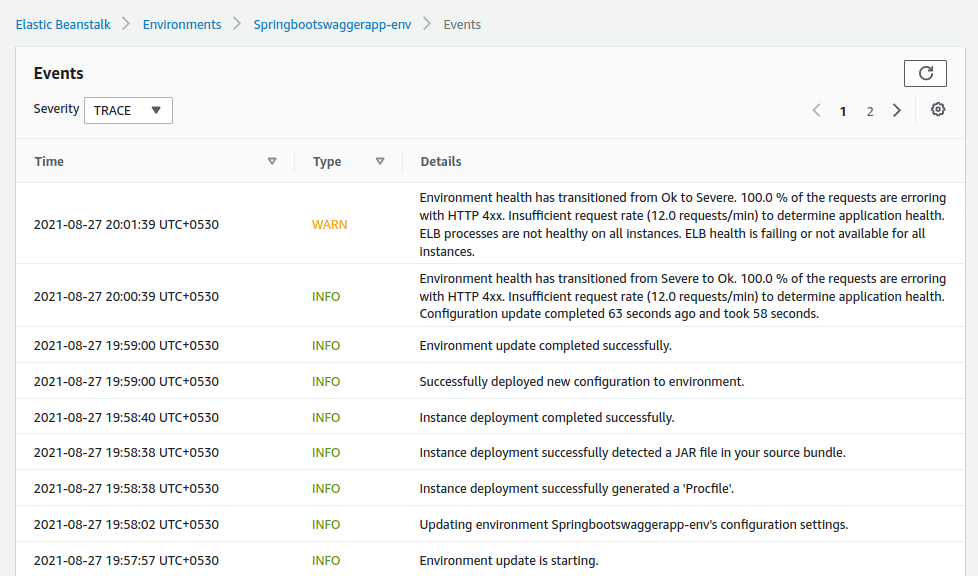
You can also check Events w.r.t your environment.
So, that’s it for this article. Thank your for reading and happy cloud computing.