If you’re looking to build a pipeline for data flow, then StreamSets Data Collector is one of the best open source products out there. I recently tested out the StreamSets Data Collector with Apache Kafka on Docker. Here are the steps with which you can try it out.
#1. Install Docker Desktop
In one of my earlier posts, I explained how to get started with WordPress on Docker. You can check that out for more information on how to install Docker Desktop. I also published a post on how to get started with Apache Kafka on Windows. However, downloading and running Kafka locally won’t help as Docker container will not connect to your local Windows port by default.
In this case, I have downloaded Docker images of both StreamSets Data Collector and Kafka. You can check out the links below :
- Spotify Kafka – Reason I chose this was because Kafka and Zookeeper comes bundled and you can run both in a single container.
- StreamSets Data Collector – You can find the official Docker image from here.
#2. Pull Kafka & StreamSets Docker images
Next step involves pulling the docker images. Below are the commands. You can do this from either Windows PowerShell or Command Prompt.
docker pull spotify/kafka
docker pull streamsets/datacollector
To verify you can just run the below command and check it has been added to your Docker.
docker images -a
If it has been added successfully, you should see that the repository has been added.
#3. Create a network connection between Kafka & StreamSets container
Before you go ahead and start the containers, you need to create a network connection between the 2 containers. The StreamSets container needs to be able to connect to Kafka container to be able to subscribe to the the topics. By default, Kafka broker runs on port 9092 and zookeeper runs on port 2181.
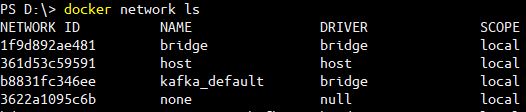
Run the below command to find out the list of networks you have.
docker network ls
Moving on, you can go ahead and create a new network using the below command.
docker network create --driver bridge streamsets-kafka
The next step that you need to do is run both the Kafka and StreamSets container using this network. You can use the below commands.
docker run --network=streamsets-kafka -itd --name=docker-kafka spotify/kafka
docker run --network=streamsets-kafka -d -P --name streamsets-dc streamsets/datacollector
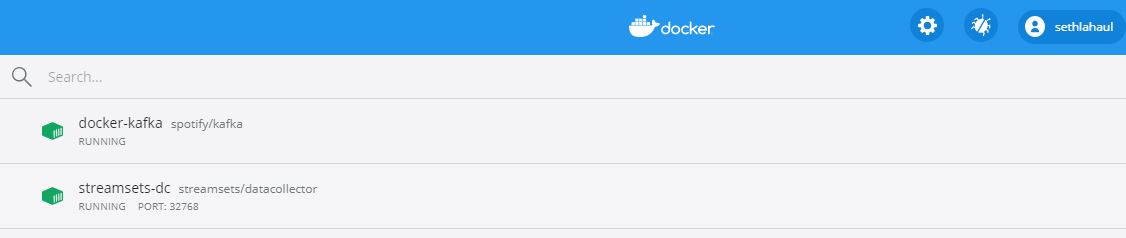
If the containers start running, you should see them running in your Docker Desktop.
Once the containers start running, you will need to check the IP addresses which has been assigned to both the containers. Run the below command.
docker network inspect streamsets-kafka
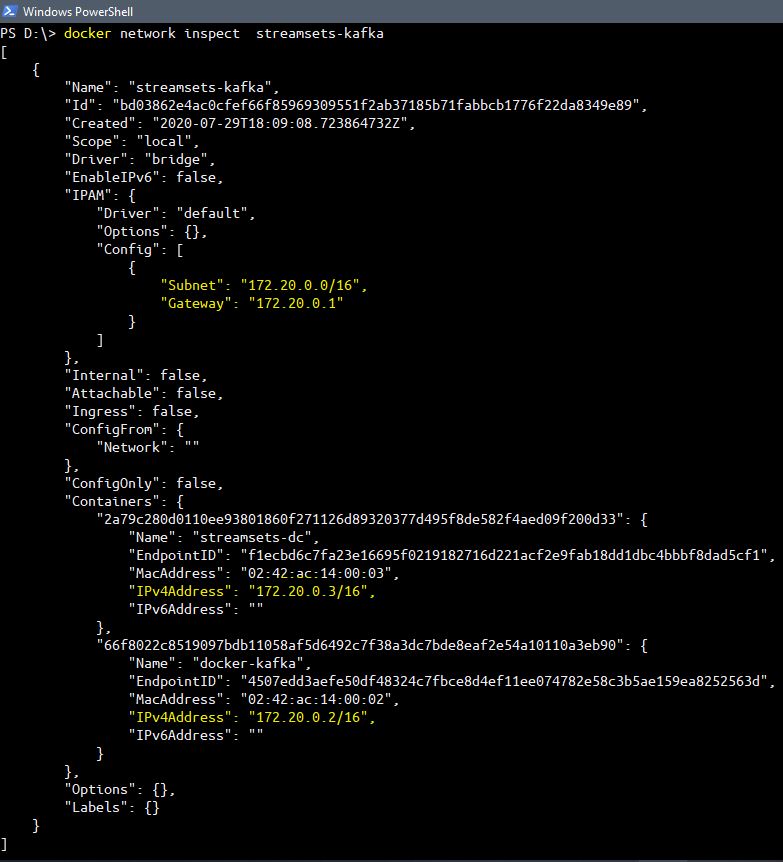
Basically, Docker has internally created a subnet and has assigned 2 IP addresses to the containers. Since they are running in the same subnet, they can communicate with each other.
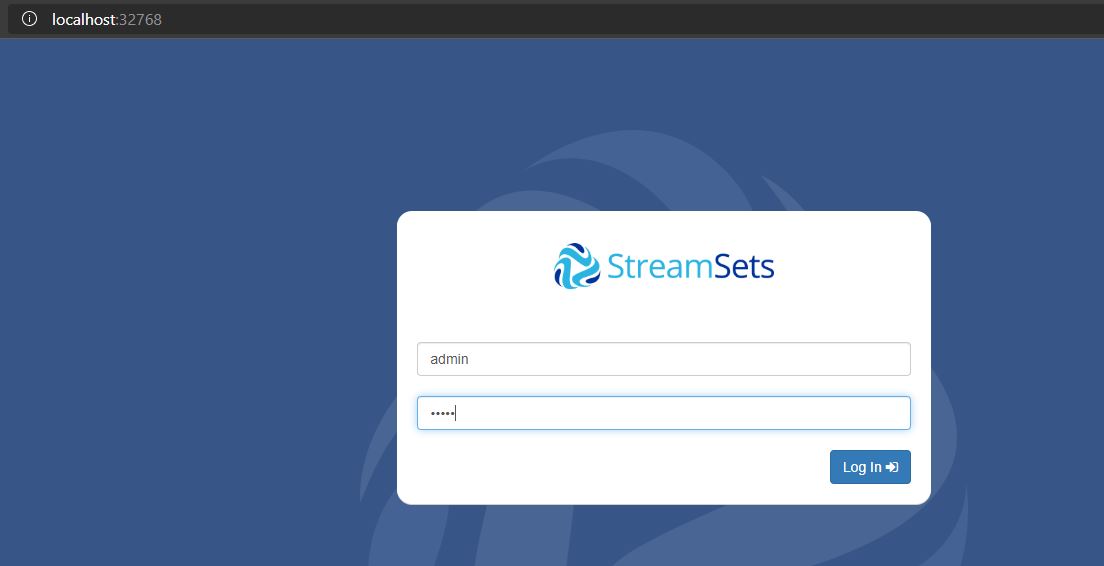
#5. Launch StreamSets Data Collector from Docker Desktop
You can launch the StreamSets Data Collector directly on your Browser. By default, username/password is admin/admin.
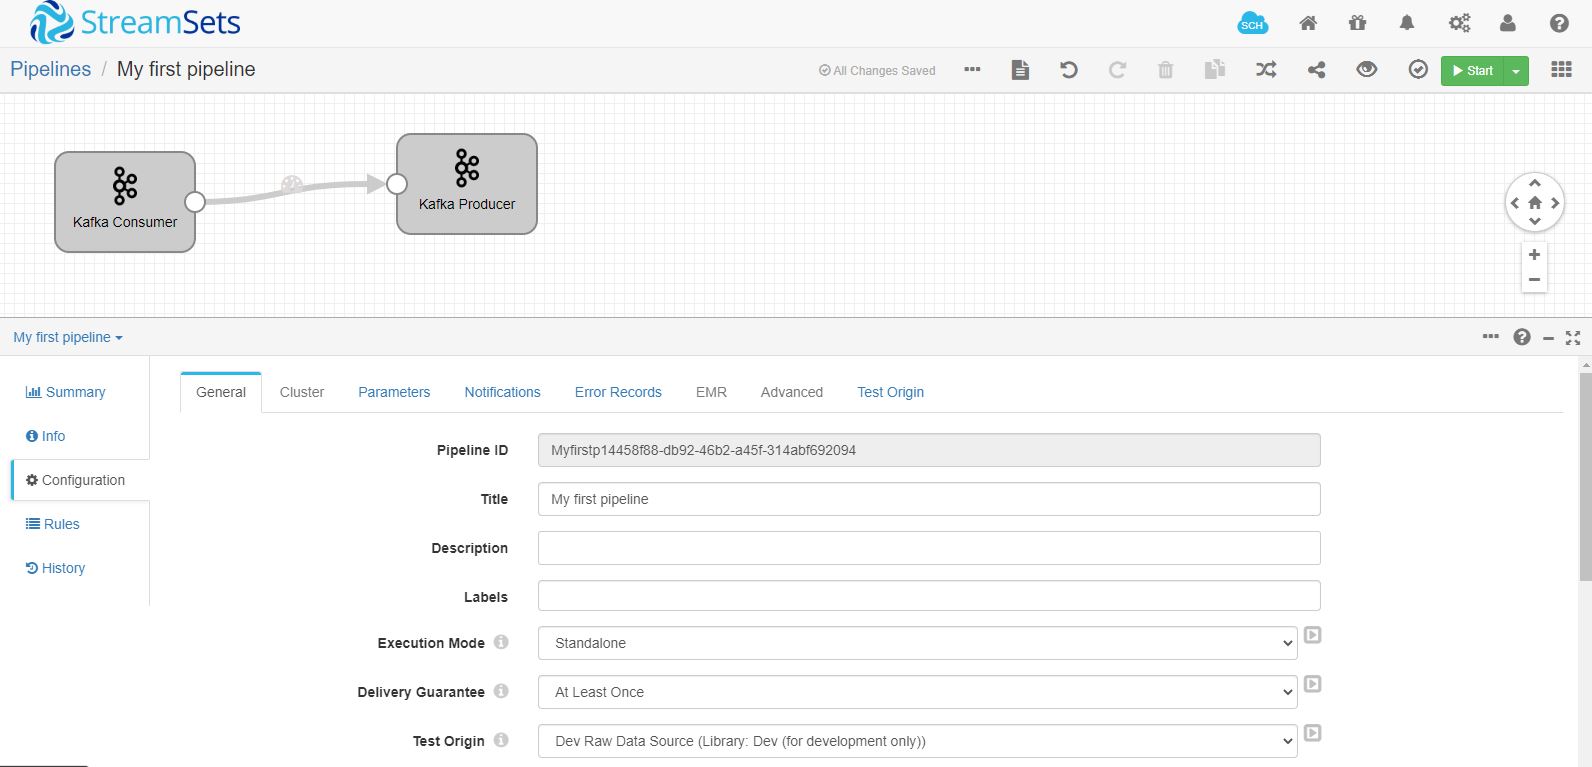
#6. Building the pipeline on StreamSets Data Collector :
First thing that you need to do is create a pipeline.

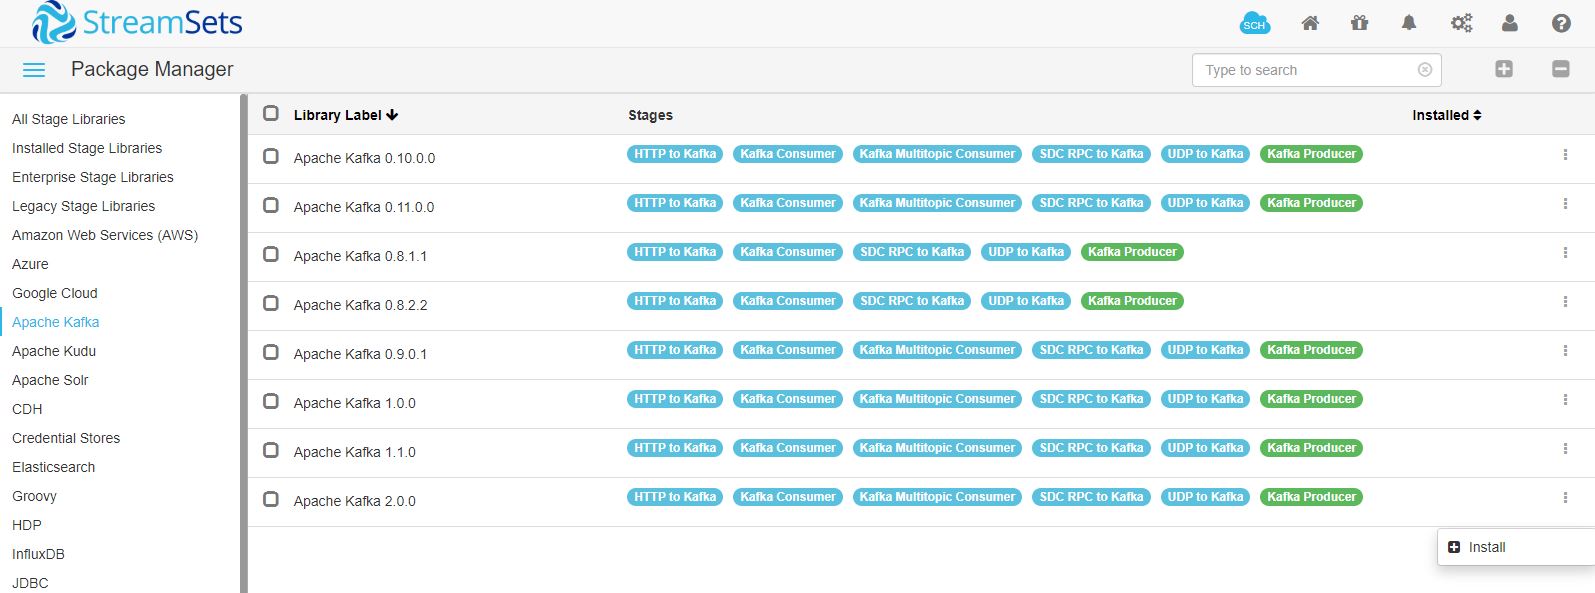
By default, Kafka libraries will not be installed. You can just go to the package manager and install Kafka libraries first.
Once the Kafka library has been installed, you will need to restart the StreamSets container which can be done from Docker Desktop. After restart, you can proceed to building the pipeline. Here’s how it will look like.
#7. Configuring Kafka
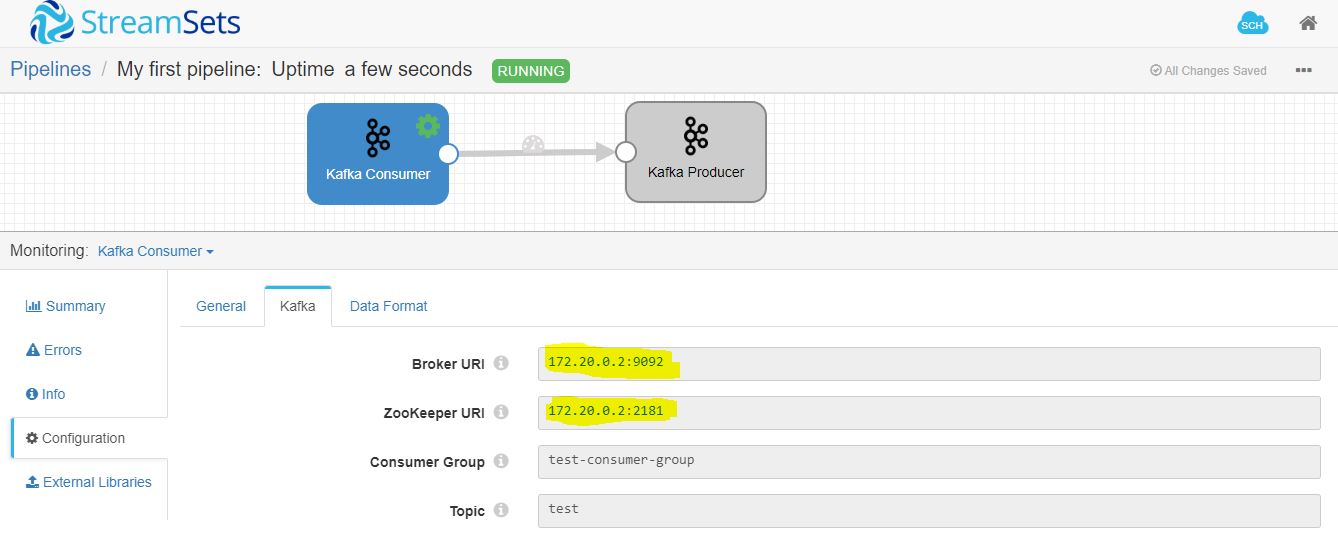
In my case, I have just built a simple Kafka consumer and producer. By default, Kafka comes with a default topic – “test” and a default consumer group – “test-consumer-group”.
Below are the settings which I used for Kafka consumer. Make sure to provide the broker and zookeeper IP which was present in streamsets-kafka network for the Kafka container.
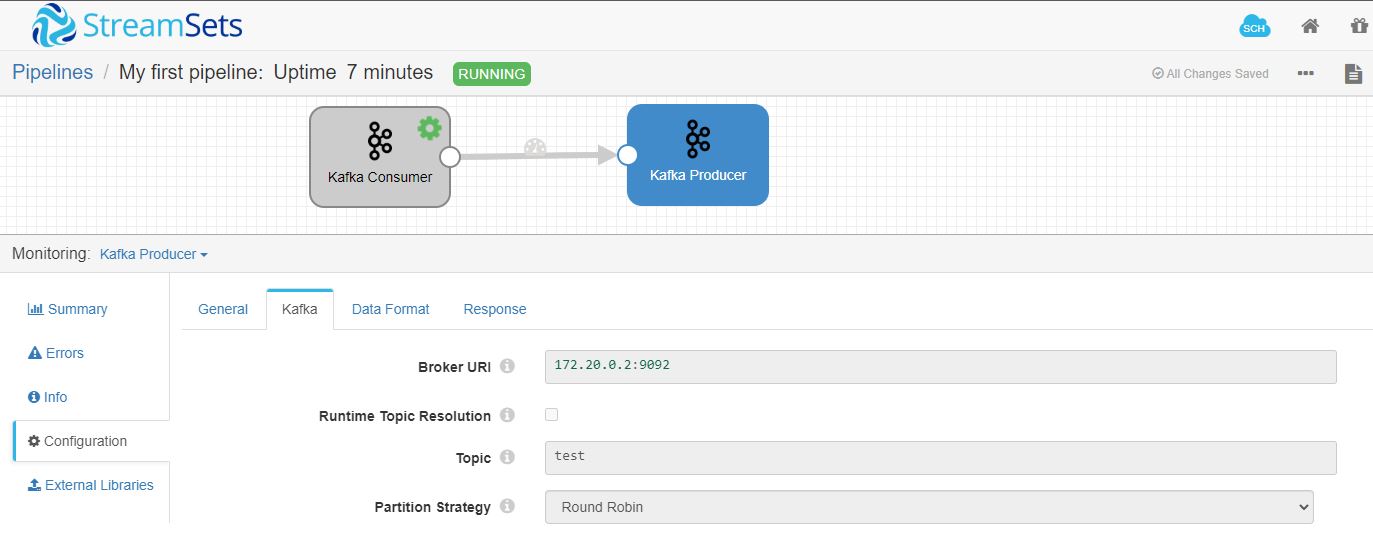
For the Kafka producer, I have given the same IP and topic. When you manually post a message to the topic it will go back and forth in a continuous loop.
Next thing that you can do is post a message manually to the topic from the Kafka container CLI like below.

Once the message has been pushed, you will see that the pipeline will start processing the records.
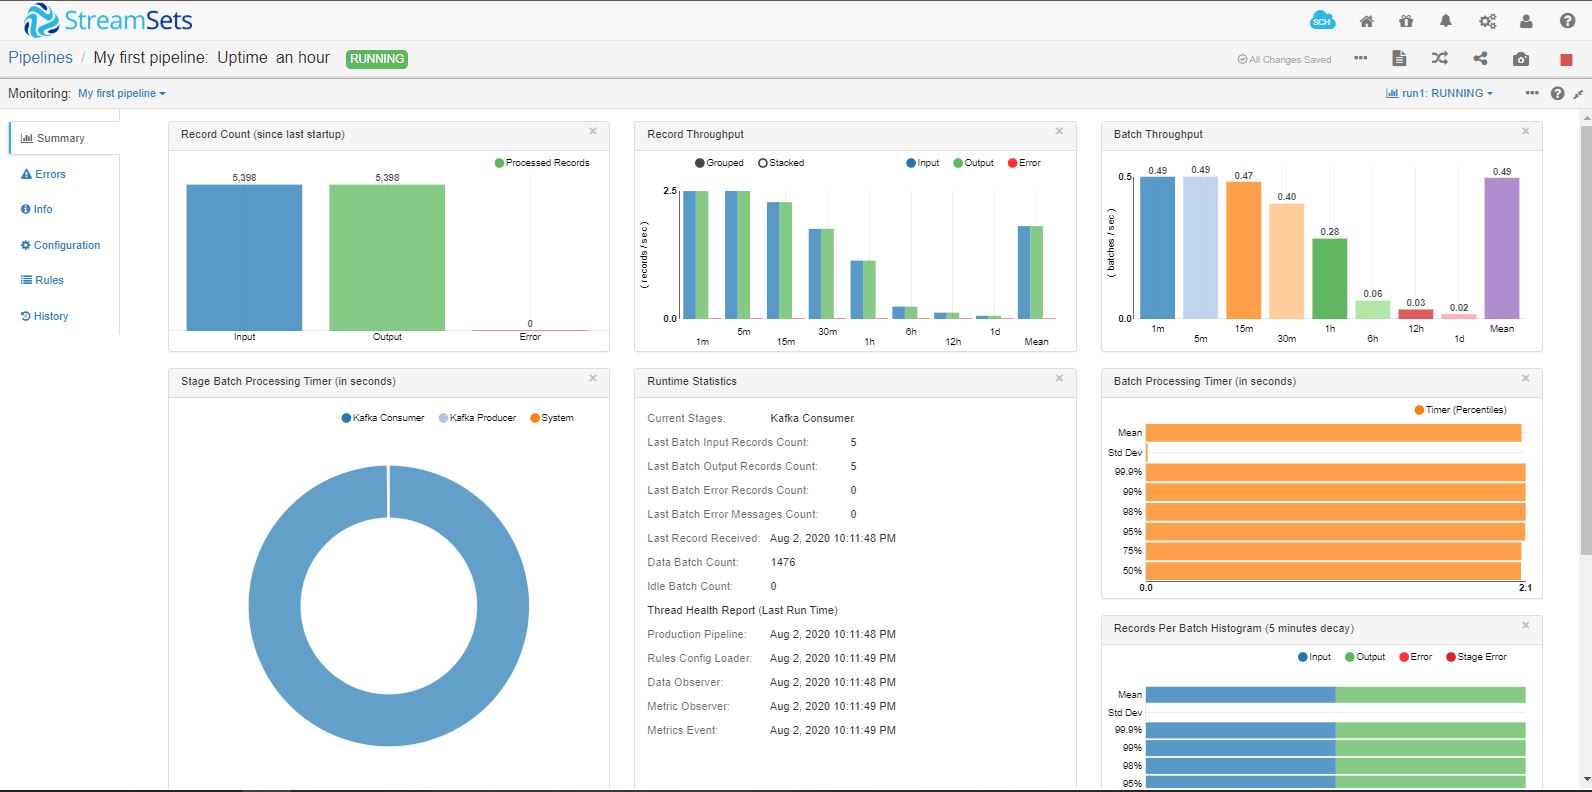
#8. Pipeline Monitoring in StreamSets Data Collector
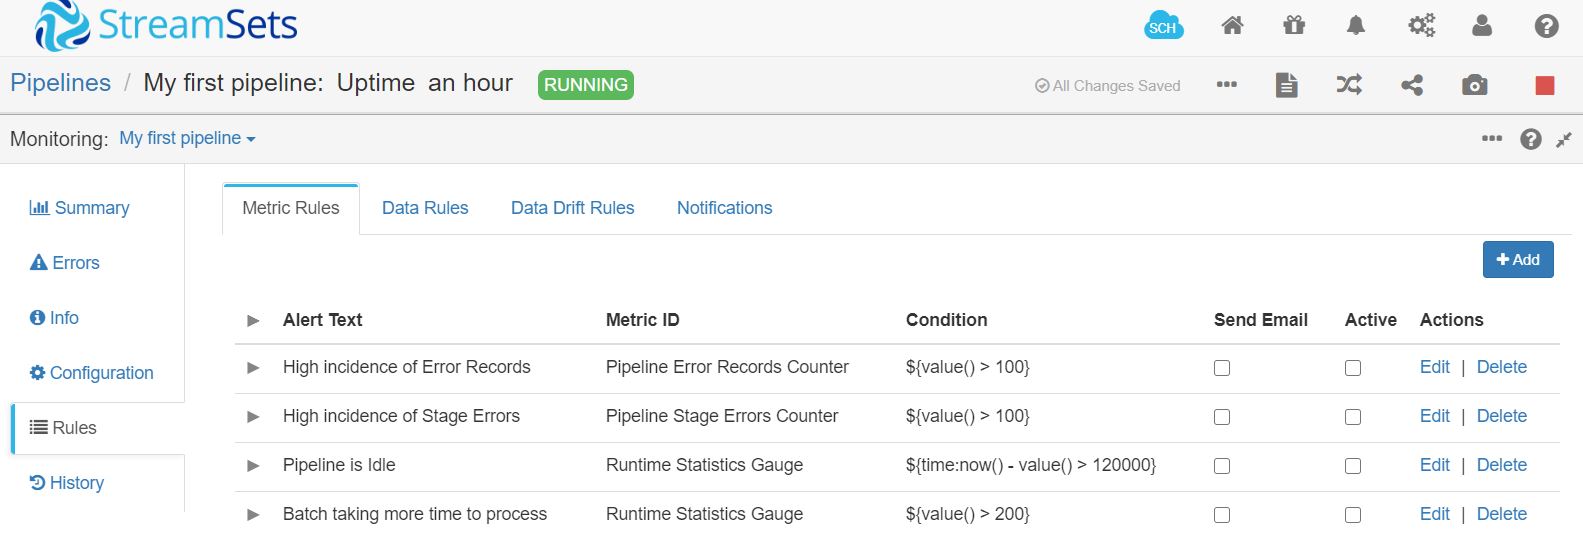
One of the best features that StreamSets provides is monitoring of the pipeline itself. You can setup email alerts based on specific thresholds. This not only helps in proactive monitoring of the pipeline but also helps to debug issues in the pipeline.
Below are some of the alerts that can be set.
If you’re looking for more info on StreamSets Data Collector, you can check out their official user guide.
So, that’s it for this tutorial. Stay tuned for more useful tutorials.